Before we Remove Activate Windows 10 Watermark Permanently look at this super cool computer beautifier make your computer stand out by animating things. This not just works offline but its online mode works whenever you search and browse things online. This comes with a beautiful animated search engine. This search engine is made to make your searches smoother and attractive unlike other traditional search engines. When it comes to browsing mode it makes browsing ultra-smoother this add spring sense animations to make it even classier you get the customizable interface with this. This is wall wave beautifier get your hands on. Try that yourself it is fun when you use it.
I will show you the best and a complete legit way to remove activate Windows watermark on your Windows 10. You will never complain like it keeps coming back again. You would not need any software or download for this. This is going to be a four step process just does not miss any steps.
Run Windows Registry Editor
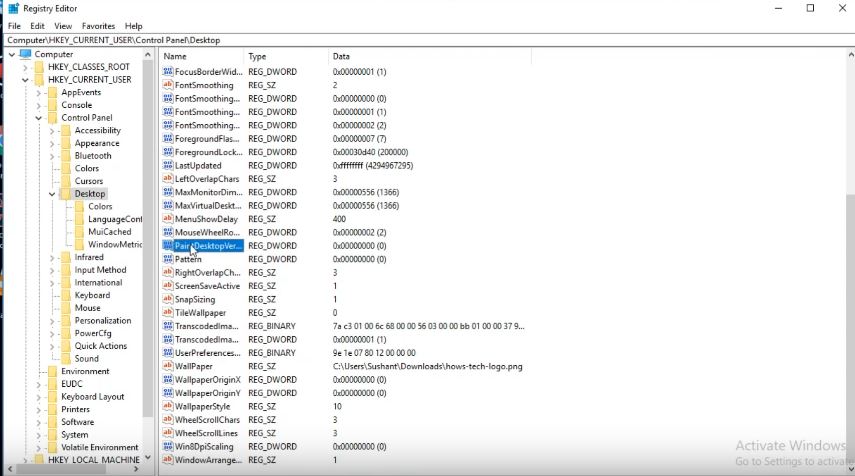
Press windows + r key to open run window this is where we will run registry editor. So now type regedit in this field and click on OK. In this registry editor, we will need to make some changes which will make that watermark disappear. Now on the left side of window there is a list of registries. Open HKEY_CURRENT_USER. Click on the arrow to expand it now find control panel in the list and open it. You will see Desktop key. Now open this key, on the right side area search for Pair Despot Version. Right click on the key and select modify. In value data field type 4 and save the key. Now minimize all these registries and close the registry editor.
Update Windows Policies
In the next step we have to load and update policies. So press Windows + S key to open search menu. Type CMD, right click on command prompt and select Run as administrator. Now let’s execute one command here which will refresh the group policies. Type gpupdate / force and hit enter. Now what we changed the registry editor is refreshed. Again open run and type regedit and open registry editor. This time navigate to HKEY_LOCAL_MACHINE then SYSTEM then CurrentControlSet. Inside that, open services, a big list will show up here. We need to search for SVSVC registry. Click on SVSVC registry. Do not expand it. The right side area, you will see start key. Right click on start and select modify.
Now change value to 4. Now being in the same registry right click somewhere in the blank area select new and then key. Set name of the key to KMS. In the right side area open default key and set value to KMS_4. Close the registry editor. It is important to close registry editor so that the changes are considered while refreshing GP. Now press Windows key plus r key and open search menu. Type CMD and open command prompt as an administrator. Make sure you open command prompt as an administrator access.
Update GP again
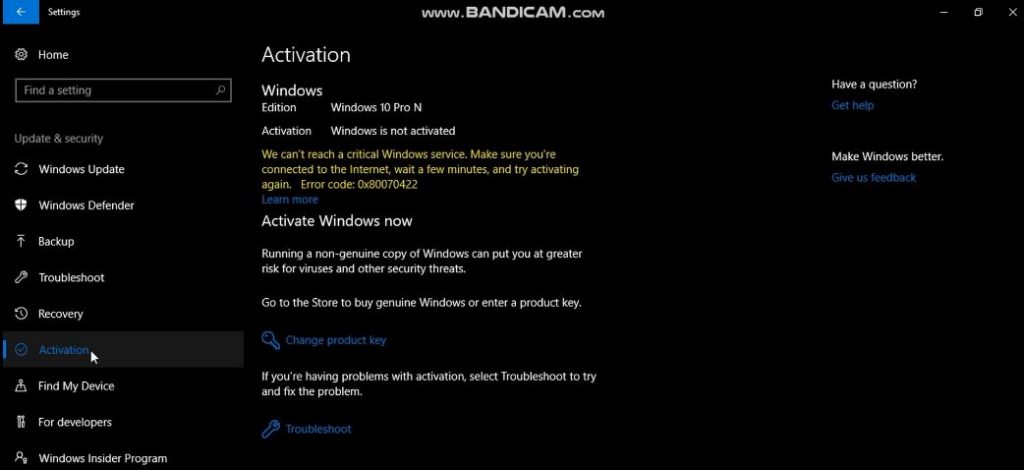
We have to again update the GP so open command prompt as an administrator and execute the same command gpupdate /force. Do not close command prompt. Now here comes an important stage. Open start menu, type settings. On the bottom right, select update and security. Now on left side click on activation, you will see your system is not activated. We have to make this thing activated. After completing our steps, we will verify it from this screen.
From this screen copy windows Edition which is now required at this stage. In my case it is Windows 10 Pro and it could be different for you. Once I copied it I will show you KMS activation keys for all versions they are released directly from official KMS. These keys are available on Microsoft site as well. These are the KMS keys for all Windows versions. Copy your KMS keys to notepad. I will direct copy from notepad for my Windows 10 Pro Edition.
Move that to the command prompt type in command. Press ENTER and wait for a few seconds. The message will be displayed. Now type in command (slmgr /skms kms8.msguides.com) hit enters and waits for the message. You then go for this next command type (slmgr /ato) press ENTER and wait for a few seconds. The message will be displayed will show you a successful message again.
Execute GPUPDATE command
Now one more important step is remaining in the cheated stream but before we go there just refresh on desktop you will see the message is now gone but you will still see a small message for build version. Now you can receive it from Run window and go to registry editor. On HKEY_CURRENT_USER then CONTROL_PANEL key click on this pop double-click on pane desktop version key now change it to zero again now for the last time we have to execute gpupdate command as we have made a change to registry. Now we’ve been command prompt as an administrator then / false and hit enter you now refresh the desktop and see the change the message is there now just go to control panel and see if your windows is activated or not thanks for reading this tutorial article.
I would encourage you to try out a wave beautifier software for your computer as I said it is fun when you use it look at this super cool computer beautifier make your computer stand out by animating things this not just works offline but it’s online mode works whenever you search and browse things online this comes with a beautiful animated search engine this search engine is made to make your searches smoother and attractive unlike other traditional search engines when it comes to browsing mode it makes browsing Ultra smoother the sad spring sense animations to make it even more classy you get the customizable interface with this this is will wave due to fire you get your hands on try it yourself it is fun when you use it

https://waterfallmagazine.com
Great information. Lucky me I discovered your site by chance (stumbleupon).
I have saved it for later!
My webpage :: javascript interview questions